Plant Imager communicationsLink
OverviewLink
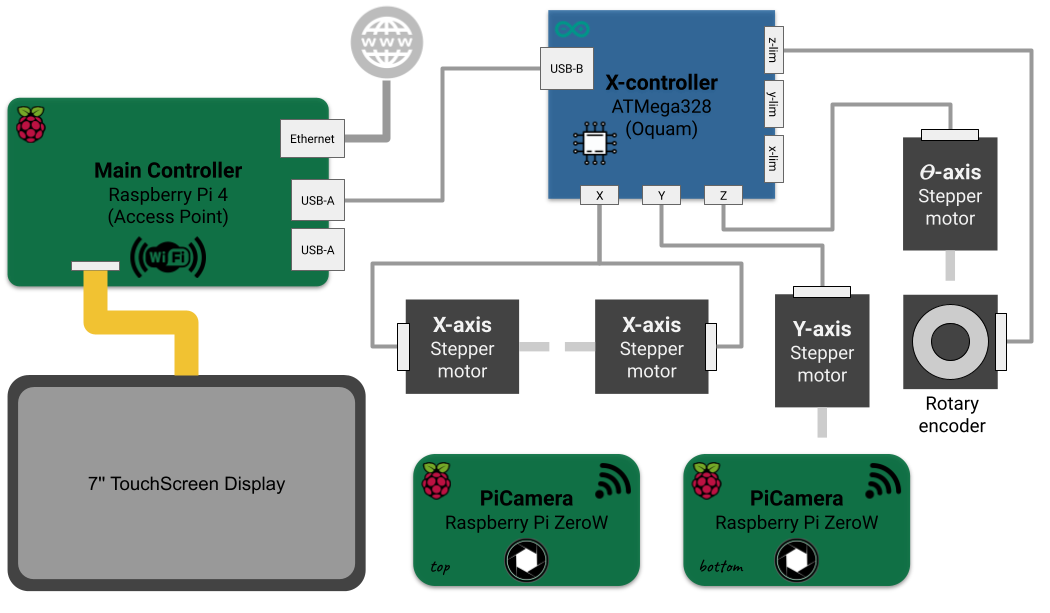
We use a Raspberry Pi 4 as a "main controller" to:
- attach a touchscreen to display and interact with the Plant Imager user interface
- control the CNC (with
Oquam) over USB - create an access point
- control the PiCamera(s)
It thus acts as an Access Point (a.k.a. Hotspot) for the other devices, notably for the PiCamera(s) (Pi Zero W).
Note
The Ethernet connection is not mandatory, you may want to isolate this from the internet for security reasons!
Access pointLink
As the above schematic illustrate, in the following steps you will create a local network.
This will require to choose:
- an SSID, that is the name of the network the other devices will connect to
- a password, to restrict access to this network
For the sake of clarity, we will use:
- SSID:
Plant Imager - password:
my_secret_password!
Warning
Change the password as it is not so secret anymore, and use a strong one!
RaspberryPi OSLink
As the above schematic illustrate, in the following steps you will set up several Operating Systems.
This will require to choose:
- a username, that is the name of the (admin) user
- a password, to restrict access to this device
For the sake of clarity, we will use:
- username:
romi - password:
my_raspberry!
Warning
Change the password as it is not so secret anymore, and use a strong one!