Workshop IPPN Anger 2023Link
TalkLink
By Fabrice Besnard.
You can find the slides used during the presentation made by Fabrice Besnard on the ROMI Google Drive here.
DemonstrationLink
By Jonathan Legrand & Fabrice Besnard.
You can find the slides used during the demonstration made by Jonathan Legrand on the ROMI Google Drive here
Getting startedLink
Install Docker EngineLink
If it's not done already, install the Docker Engine on your machine.
Follow the official instructions here: Install Docker Engine.
Pull the Docker imageLink
We made a specific Docker image for this workshop shipping an example dataset and notebooks.
To pull this image, from our DockerHub:
docker pull roboticsmicrofarms/plant-3d-vision:ippn
Start a containerLink
To start a container based on this roboticsmicrofarms/plant-3d-vision:ippn image:
docker run --rm --gpus all -p 8888:8888 roboticsmicrofarms/plant-3d-vision:ippn
This should start a container and jupyter notebook.
Note
--rmautomatically remove the container when it exits-gpus alladd all GPU devices to the container-p 8888:8888bing your port 8888 to the container port 8888
To stop the container, press ctrl + c twice to exit the jupyter notebook, this will also stop (and destroy) the container.
Connect to the notebookLink
Following the previous docker run command, a series of messages should appear in the terminal.
They are emitted by jupyter notebook, and they should give you something like:
    To access the notebook, open this file in a browser:
        file:///home/myuser/.local/share/jupyter/runtime/nbserver-1-open.html
    Or copy and paste one of these URLs:
        http://fdc0ad0ca87d:8888/?token=0598c4791146a98cf9b0c9344c32a7df15e703af79415ea7
     or http://127.0.0.1:8888/?token=0598c4791146a98cf9b0c9344c32a7df15e703af79415ea7
You may click or copy/paste the URL starting with 127.0.0.1:8888 in your favorite browser.
This should take you to the landing page of jupyter notebook.
You should see something like this:
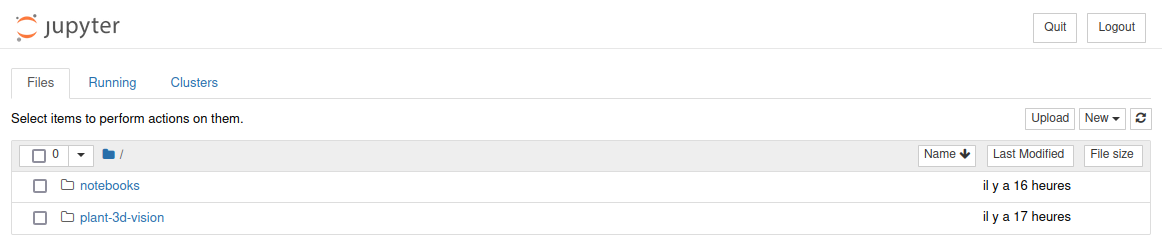
Run a notebookLink
To start playing around with our notebooks, move to the notebooks folder, then select the notebook you want to use.
Access a running containerLink
Once your container is up and running, you may open a second terminal and connect to the running container. This can be useful, notably to perform other tasks than running the notebook.
Your first need to know the ID or NAME of your container.
You may access this information by calling docker container list.
For example:
CONTAINER ID   IMAGE                                     COMMAND                  CREATED          STATUS          PORTS                                       NAMES
969493021b00   roboticsmicrofarms/plant-3d-vision:ippn   "/bin/bash -c 'jupyt…"   30 seconds ago   Up 29 seconds   0.0.0.0:8888->8888/tcp, :::8888->8888/tcp   exciting_shamir
To access this container you can then call:
docker exec -it 969493021b00 bash
myuser inside the 969493021b00 container, and your terminal should look like this:
myuser@969493021b00:~$
Launch an interactive containerLink
If you do not wish to use the jupyter notebook or want to start the container and gain access to the terminal, simply do:
docker run -it --rm --gpus all -p 8888:8888 roboticsmicrofarms/plant-3d-vision:ippn bash
To exit the running container, press ctrl + d to log out and destroy it.
Perform a reconstruction jobLink
Once you followed the access a running container or launch an interactive container instruction, you can launch a reconstruction job on a dataset.
For example, to obtain a point cloud using the geometric based reconstruction pipeline for the Ler_20220803_2_1 dataset, simply run:
# Start by cleaning the dataset:
romi_run_task Clean $ROMI_DB/Ler_20220803_2_1 --config plant-3d-vision/configs/geom_pipe_real.toml
# Reconstruct the point cloud:
romi_run_task PointCloud $ROMI_DB/Ler_20220803_2_1 --config plant-3d-vision/configs/geom_pipe_real.toml
Access a host directory from the containerLink
As we did not bind a local directory to the container, everything you do in that container will stay inside it (hence the name...).
This also mean that upon exit (and destruction with the --rm option), all of your work and modification will be gone!
To prevent this, you may use the -v option to bind mount a local folder as a volume in the container.
For example, to mount another database from your host, registered under $ROMI_DB, use: -v $ROMI_DB:/myapp/db.
Note
This will 'overwrite' the demonstration database (for this container only).
FYILink
Here are a few facts about this Docker image:
- The
plant-3d-visionsources can be found under$HOME/plant-3d-vision. - The database can be found under
/myapp/db, this path is saved to theROMI_DBenvironment variable. - The shared database has been acquired using our Plant Imager v2 with a Sony RX-0 camera (more info here).
- If you perform a reconstruction using the task
Colmapit will use another Docker image namedroboticsmicrofarms/colmap.